Drawing Custom Stock – SprutCAM America

SprutCAM America – CAM FAQ’s
March 1, 2019
How to Machine Holes with CAM
March 5, 2019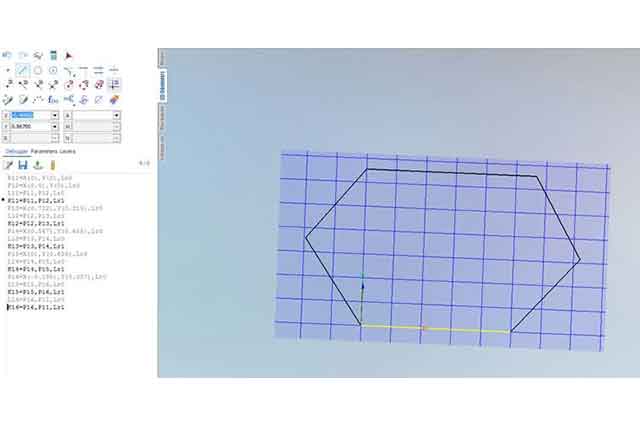
You may find yourself working with helix stock, or any shape stock for that matter, and unable to replicate it in SprutCAM. Well there is a way to do it by using the 2D Geometry tab, or by importing a dxf.
First, choose whichever plane you want the stock to be extruded along. XY will create it along the Z axis, YZ along the X axis, and ZX along the Y axis. Essentially whichever axis you want it to go in, find the option that doesn’t have that axis listed.

Draw the shape of the stock.

Copy the drawing in the 2D geometry tab by right clicking the plane you drew in.

Then Paste it into the white area below Workpiece.

Join the Curves together to make it easier to select it,

Now go to the machining tab and workpiece. Hit extrude and set the top level to 0 and the bottom level to the depth of the material (you could do bottom 0 and have top be the length as well). Choose the YZ plane, or whichever plane you drew in, in the box and hit Add. This is where you would select the DXF if you chose that route as well.

Now, double click the created stock and set the intended axis for it to extrude along and you should then see the extruded stock.